Currently Shopping For: : Portal

Green & Eco-Friendly Printing Services

Producing High-Quality Print While Protecting Natural Resources

From the paper we use to the electrical engineering of our facilities and equipment, we strive to be as eco-friendly as possible and are constantly looking for and investing in new ways to reduce our consumption and leave a smaller environmental footprint.

Saving Trees

Saving Trees

We print a lot and recycle a lot too! Based on our recycling initiatives and calculations from Shred-it Corporation, we save about 6,500 trees each year. We are incredibly careful to maximize every bit of paper we work with to reduce the amount we recycle. In fact, that is one of the approaches we take that allows for our prices to be so low.

As a part of our effort to reduce paper usage and waste in our internal administrative activities, we also save more than 30 trees a year by virtue of office paper recycling, and increased use of paperless communication methods.

In addition to the paper we collect and recycle, most all the papers we use for printing are recycled.
Clean Manufacturing

Clean Manufacturing

Our commitment to green printing pushes us to look for eco-friendly alternatives throughout our pressroom operations and communication processes.

  • We use alcohol-free dampening solutions
  • We recycle 100% of our excess paper
  • Our coatings are water-based with low-ammonia emission
  • We have implemented a completely digital workflow
  • We operate without using photo chemicals
  • We recycle our used aluminum printing plates
  • We have a paperless internal communication process
  • Our inks are high-quality, eco-friendly inks like vegetable-based inks instead of petroleum-based inks
Energy Efficiency

Energy Efficiency

Our environmentally friendly printing facility is constructed entirely from renewable and recyclable materials--brick, block, stone, and concrete--which makes for an energy efficient structure and helps reduce heat loss and regulate temperatures.

Before we moved into our facility, we recycled and replaced the lighting with fluorescent lighting--two hundred 400-Watt metal halide lamps with 250-Watt bulbs. In 2011, we replaced all overhead lighting with T8 technology—which isover 20% more energy-efficient than T12 and uses fewer materials. We replaced and recycled our aging HVAC systems--and recycled the excess refrigerants--with new units with a SEER of 14 or higher.

The Digital Advantage

As a sustainable printing company, we are firm believers in the environmental advantages of digital printing. In addition to our full complement of multi-color offset presses, we also employ state-of-the-art digital printing presses that utilize completely non-toxic, dry inks, and we recycle 100% of our waste colorants and developers.

Our digital presses run 80% quieter and use less electricity than an equivalent-sized, conventional press with an IR dryer. We also re-purpose nearly 30,000 BTU’s per hour of digital press exhaust heat back into our building during the winter months.

The big environmental advantage of digital printing comes from its ability to reduce overall material and energy consumption for printed materials by printing only the quantity needed when needed. We also added marketing solutions for our customers, like Propensity Mailing, so that printed materials only reach interested individuals and are less likely to end up in the trash. Also, by taking advantage of the personalization capabilities of digital printing, marketers can directly target their communications to recipients who are most likely to respond. This prevents mailings on a large scale where materials are sent to many people who likely have no interests and may recycle the material or throw it away, and it goes to a landfill.
Have questions?

Available from 9AM to 5PM EST, our team is here to help.


Help & Resources

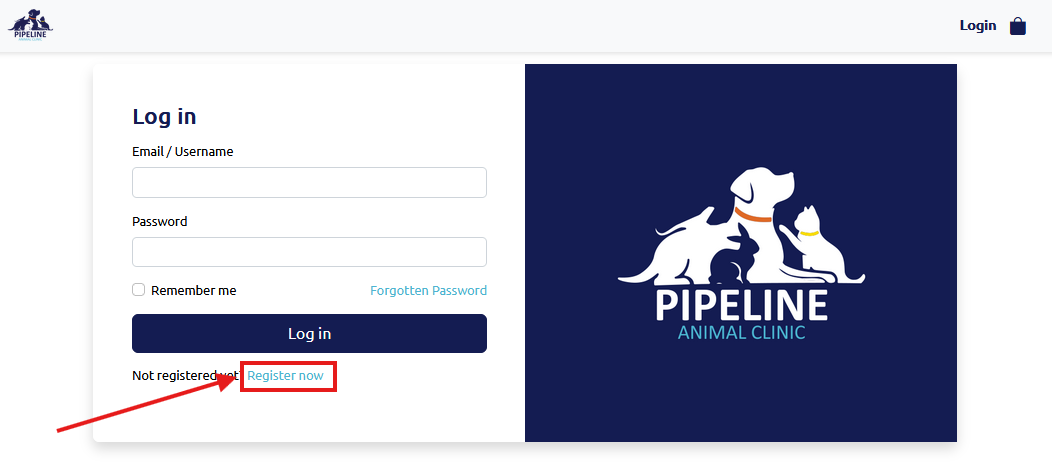
To create an account, please click on the "Login" link located at the top right of the navigation bar.

You will be directed to the login page. From here, click on the "Register now" link located under the "Log in" button.

Brochure folding options.

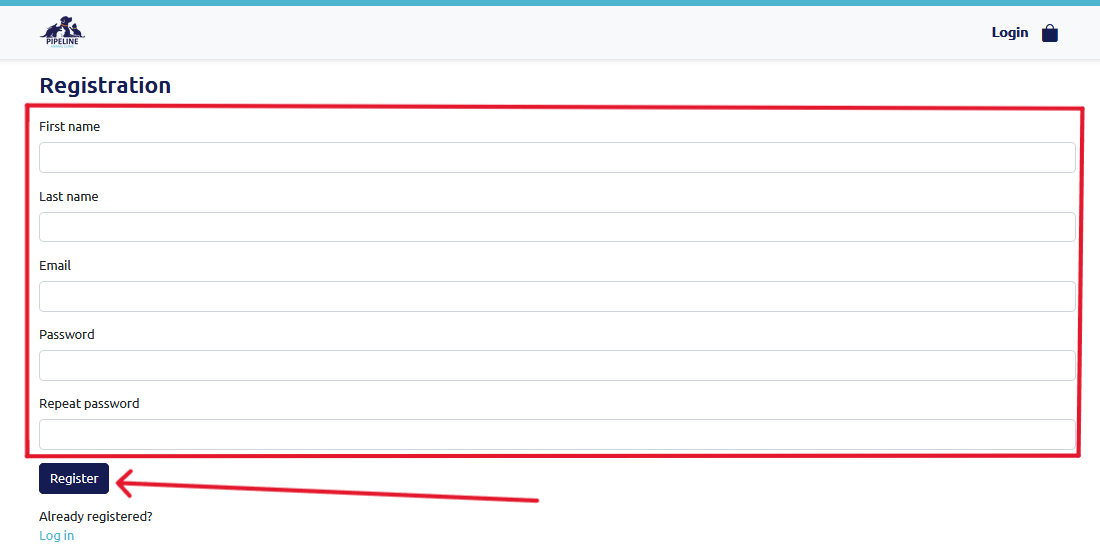
You will then be directed to the registration page. Fill in all fields. The email you fill in will be your Username for logging in. After filling in all of your information, click the "Register" button. This will direct you back to the Login page where you can fill in your Username (the email you used to register) and your password.

Brochure folding options.

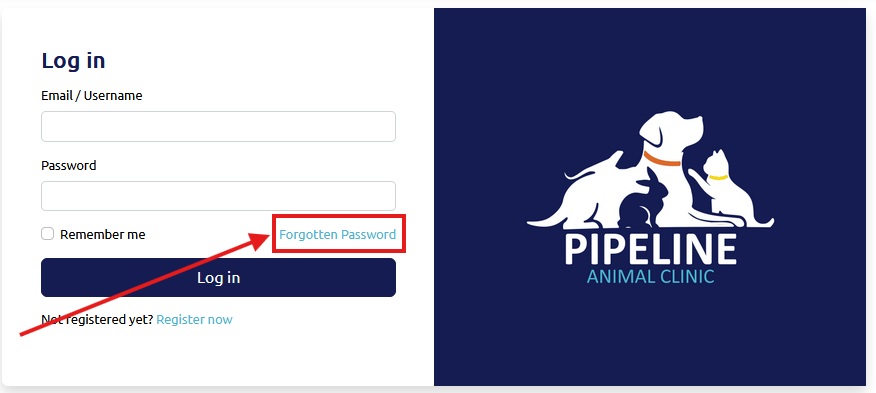
On the Login page, click the "Forgotten password" link located above the "Log In" button.

Brochure folding options.

This will direct you to a new page. Enter your email (this is the username you use to log in) and press "Send." You will receive an email from us; please click on the link in the email to reset your password.

Brochure folding options.

You will be directed to a screen like the one below, asking you to add a new password and then repeat it. Once you have entered your new password, click "Save" and then "Login" to go back to the Login page, where you can log in using your new password.

Brochure folding options.Brochure folding options.

To begin ordering, please log in to your account. You can log in by clicking the "Login" link at the top right of the navigation bar and using the email address you used as your username during registration. Once logged in, you will be able to view and shop for all products associated with your account and brand.

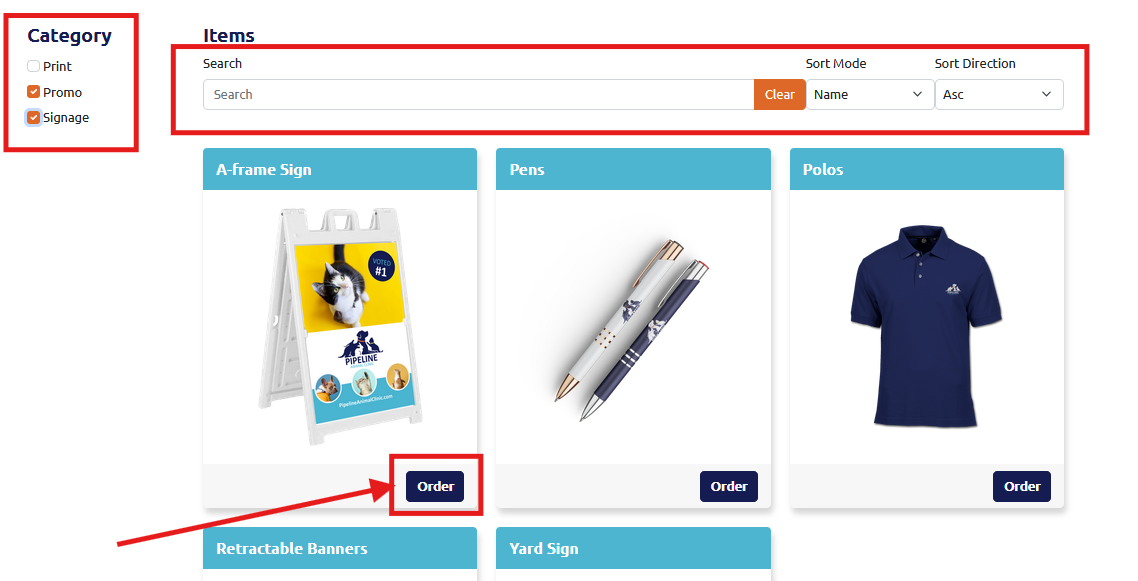
If applicable, you can filter your brand's products using the checkboxes to the right of your screen, the search bar, or the Sort Mode and Sort Direction dropdowns. Click the "Order" button for the product you would like to order.

Brochure folding options.

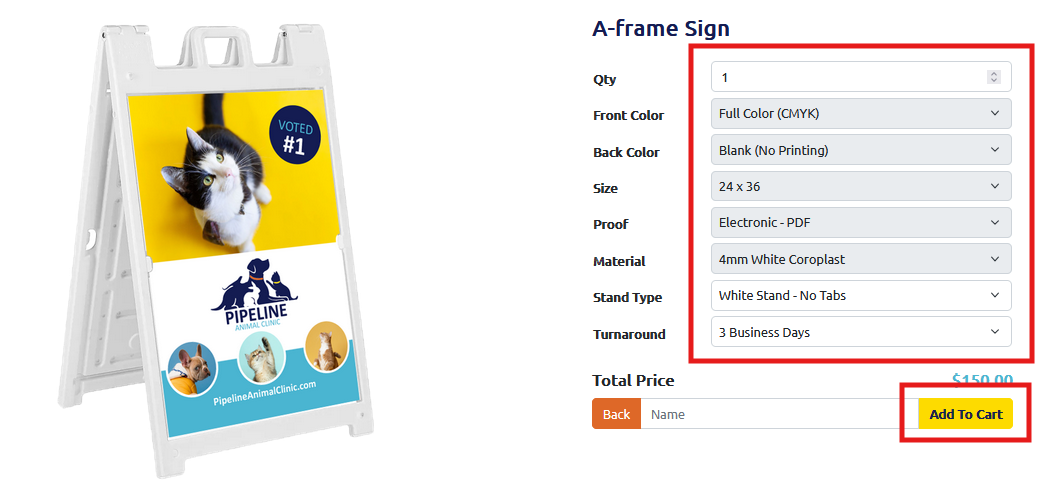
For static products (products that do not require customization), you can select specific options that are not grayed out, including your quantity, turnaround time (the time it takes to print your order), and add a Name for your job. Then, press "Add To Cart." Any options that are grayed out cannot be changed.

Brochure folding options.

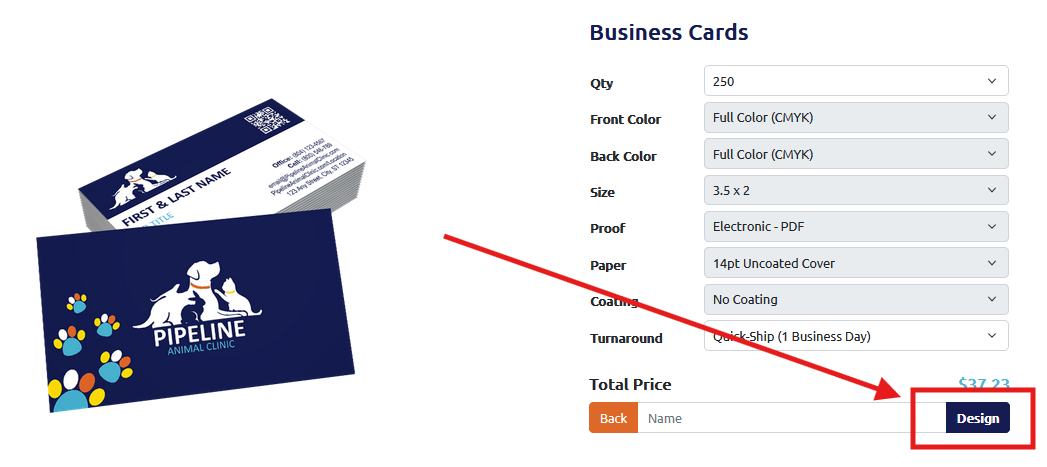
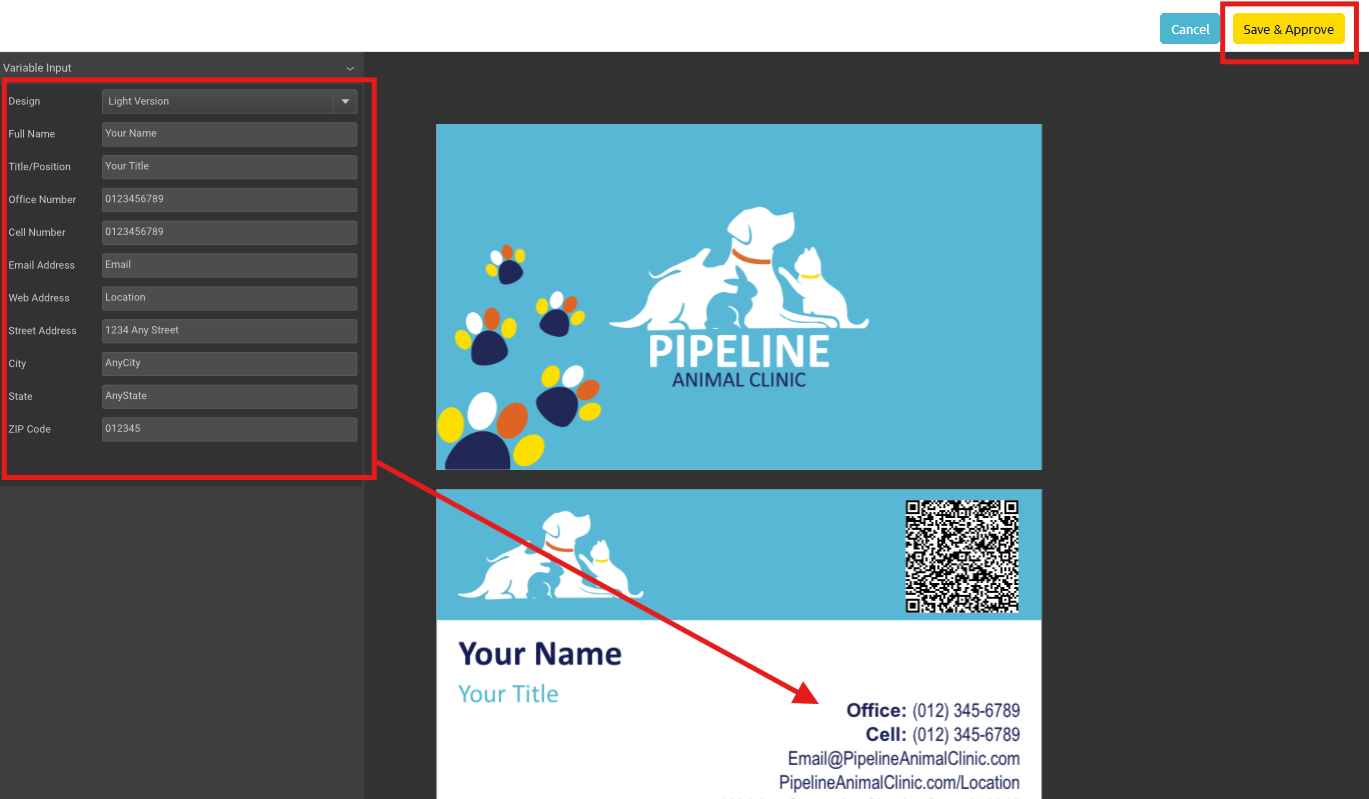
For design products (products that can be personalized), you will need to select or input any options that are not grayed out. Then, press the "Design" button to begin personalizing your product.

Brochure folding options.

A new view will appear, allowing you to begin personalizing your product. Insert any needed fields, such as contact information, background colors, images, etc. You will see the design populate your information. This is exactly how your product will look when printed. Once you have completed your customization, click "Save & Approve". This will take you back to the product page, where you can click on "Add To Cart" to proceed.

Brochure folding options.

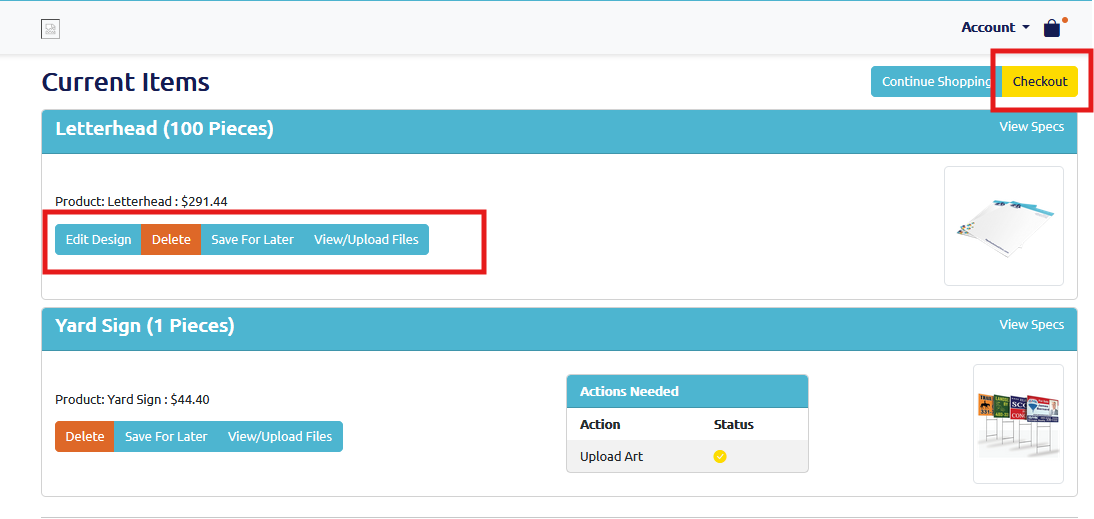
By clicking on "Add To Cart," you will be directed to your cart, or you can access your cart at any time by clicking on the bag icon in the top right of the navigation. Here, you will see all current products in your cart. You can edit your design from here if needed, delete, save a product for later, or upload files if required. Please note you can upload files after checking out as well. Once you are ready, click on "Checkout" to begin the checkout process.

Brochure folding options.

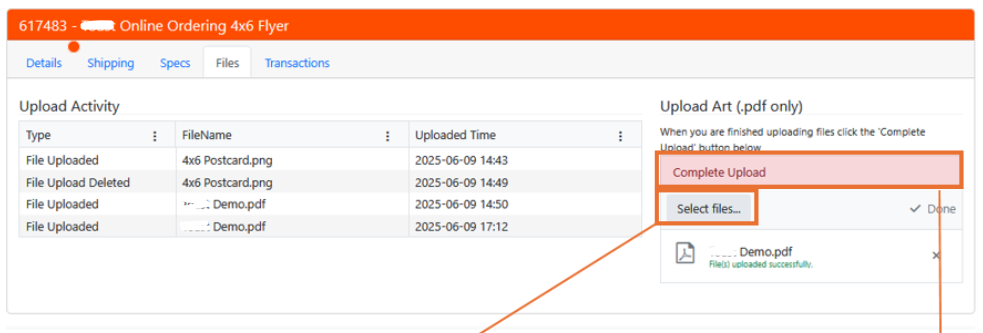
For products that require an uploaded art file, you can click on the "View/Upload Files" and then drag and drop files or select from your local files. After uploading, click "Complete Upload." After completing the upload successfully, the "Actions Needed" status will show a checkmark. Now, you can click checkout to proceed. Or you can skip the upload file process and upload your files after checkout by visiting "Your Jobs."

Brochure folding options.

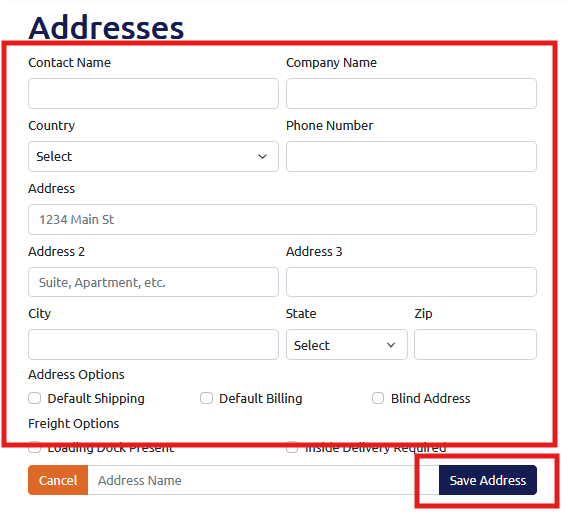
If this is your first time ordering, you'll be directed to a Shipping Address input screen. Input all relevant shipping information. You can then set this address as your "Default Shipping" or "Default Billing" to have it prepopulate in the future. Name your address and click "Save Address" to save it to the address book held on your Account. You'll then be taken to the Shipping Information Screen.

Brochure folding options.

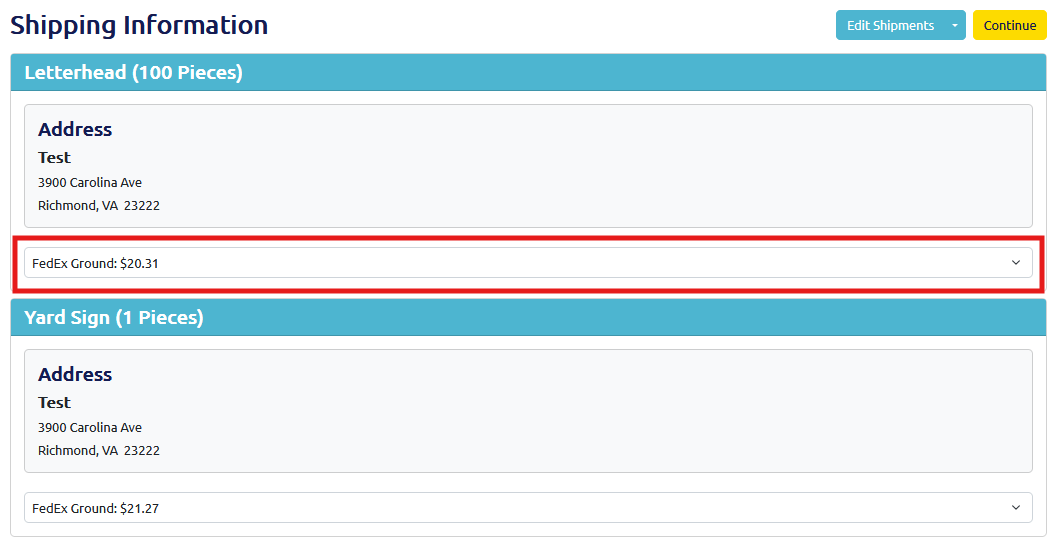
On the Shipping Information screen, click on the "Edit Shipments" button to change or add an address or split a shipment. To change the shipping type/carrier, click on the dropdown highlighted below to show a list of shipping options.

Brochure folding options.

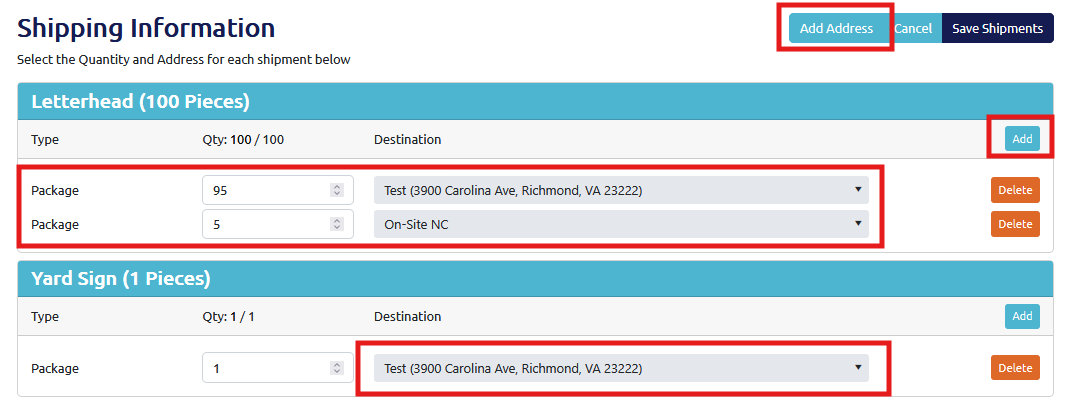
If you click on the "Edit Shipments" button, you will be directed to the Shipping Edit screen. Here, you can add a new address by clicking on "Add Address." You can change the shipping destination on this page by selecting the destination dropdown and selecting an address listed in your Account's addresses. To split a shipment, click "Add" to add multiple packages and send each package to different locations. Ensure the quantity totals the total quantity specified in your order. Once ready, click "Save Shipments" to return to the Shipping Information screen and then press "Continue" to proceed to Checkout.

Brochure folding options.

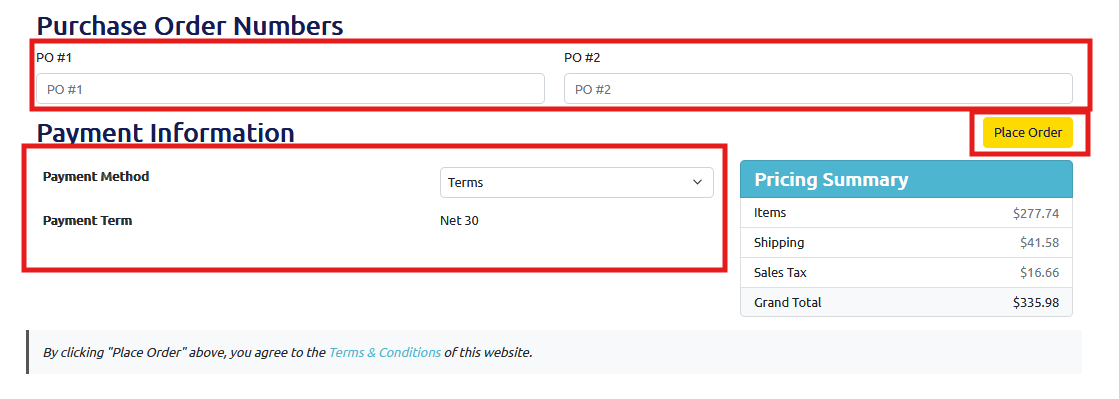
After clicking on the "Continue" button, you will be directed to the payment page. Here, you can enter Purchase Order #s, if desired, which are provided on invoices for the order. Your brand may be set up with Terms, in which case, you will see a similar screen to the one below. If your brand requires payment at checkout, you will see a field to insert a payment method. Once ready, click "Place Order."

Brochure folding options.

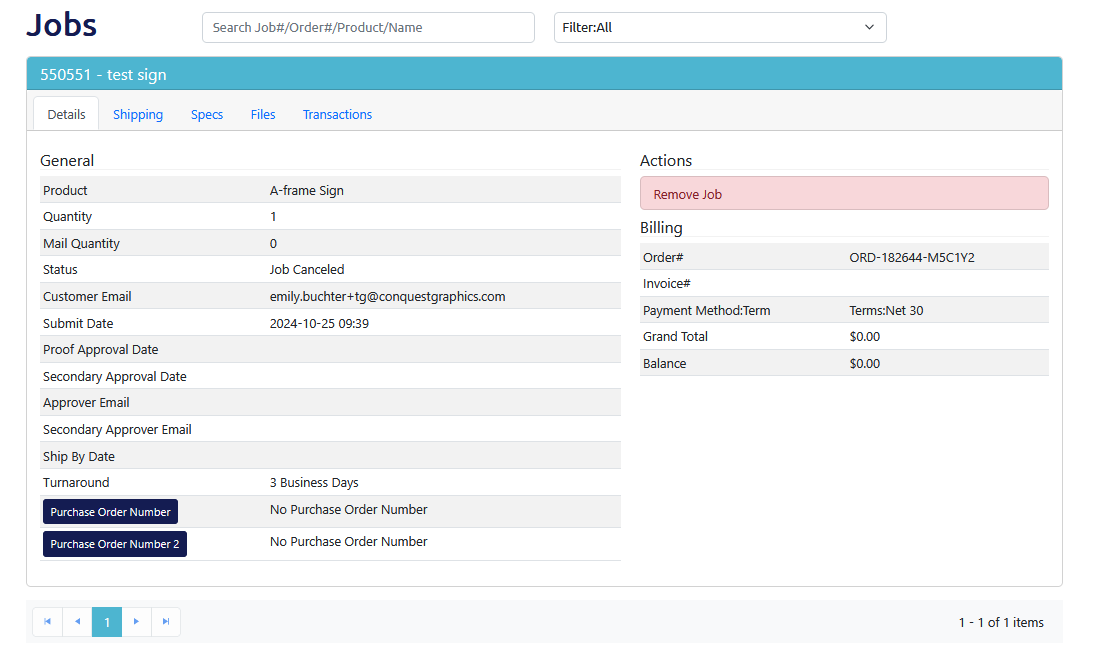
At any time, you can visit your past and current jobs by clicking on the "Your Jobs" in the "Account" dropdown. Here you will find all your jobs and their information. You can also upload art or mailing files here if needed and filter your jobs by status.

Brochure folding options.

For products that require an art file upload, you will need to approve your proof so that your job moves into production. Once your proof is ready, you'll receive a "Proof Ready" email. Click on the link to go to your portal login page.

Brochure folding options.

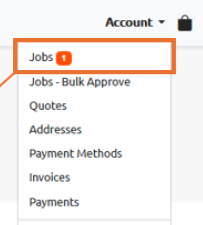
Once logged in, click on the account dropdown in the top right of the screen and select "Jobs" (there should be a number highlighted for the number of jobs that have an "Action Required.")

Brochure folding options.

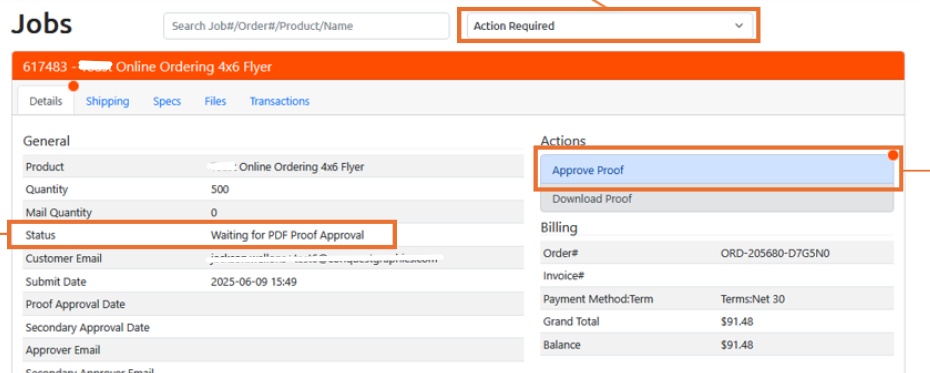
Once on the Jobs screen, if you have any jobs requiring attention, they will be immediately shown under "Action Required." "Job Status" will show as "Waiting for PDF Approval." Click on "Approve Proof" to begin the proof approval process.

Brochure folding options.

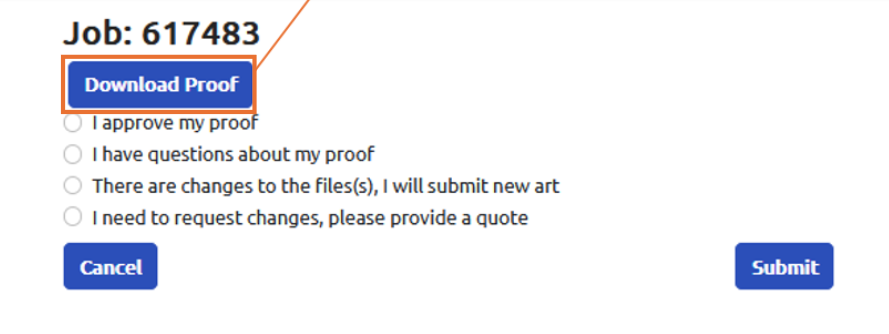
Click "Download Proof" to download and view your PDF Proof file.

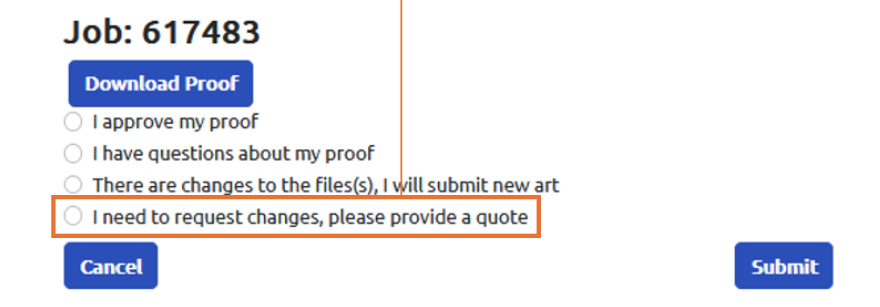
After downloading and viewing the proof, if there are no changes needed, simply select "I approve my proof" and then "Submit" to send your job directly into production.

Brochure folding options.

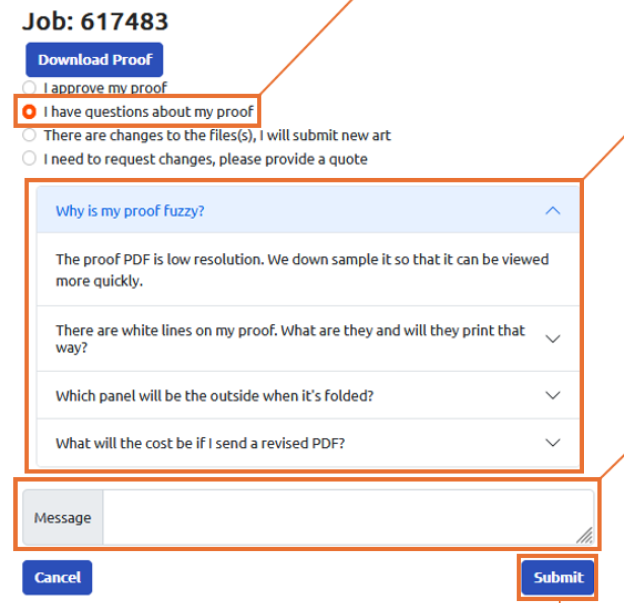
If you have questions after viewing your proof, select "I have questions about my proof." Frequently asked proof questions will appear. Include a message to our prepress team or request a change to your artwork and then click "Submit." Your message will be sent to our prepress team. The job won't be moved into production, and another proof approval will be required after our team has addressed your question or changed the artwork.

Brochure folding options.

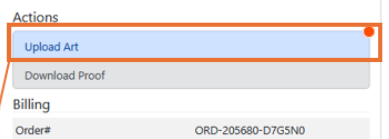
After viewing your proof and you need to upload an entirely new art file, select "There are changes to the file(s), I will submit new art." Click submit. The job listed on your Jobs page will now prompt you to upload new art. Select "Upload Art." Upload the new art file from your local files and then click "Complete Upload" to finish the process.

Brochure folding options.Brochure folding options.Brochure folding options.

Select "I need to request changes, please provide a quote" if you need to completely change the specifications of the product you ordered. We will then be in touch, and your current job will not move into production.

Brochure folding options.

You should receive an email with a link to your proof within 2-8 business hours after uploading your file.

Need additional assistance? Click below to chat with our team of experts.

Chat With Us